We’ve been doing sheet mulching or lasagna gardening to build topsoil in our forest garden. Over a period of three years we’ve gradually added layers of rice hulls, manure, straw, leaves, sugar cane compost, etc. to raise our forest garden beds about 12” above the paths. Sheet mulching has worked superbly for us in our tropical climate. Just don’t make the layers too thick. In colder climates, let sheet mulch layers break down over winter.
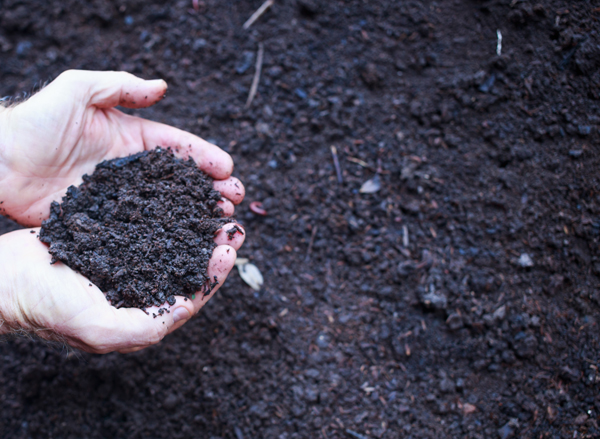
From this point onward we’re going to make large piles of homemade passive compost and then spread it on the garden to improve the soil. We’re making our own compost because the soil and compost that’s locally available is rubbish. I can barely get seeds to sprout in store bought compost, partly because it’s in sealed plastic bags that kill the microbes. In fact, virtually all of the soil and compost available here is dead due to industrial farming and lousy composting practices. ***The value of having large quantities of excellent compost is immeasurable – it’s sort of like black gold for gardeners. Everything will germinate better, grow bigger and faster, have fewer pests and diseases, and be tastier and more nutrient dense, because the soil is full of life.
We were extremely fortunate to meet a professional compost maker who explained his passive composting process in detail. Because he has extensive experience using the same materials we have available, I consider meeting this guy like hitting the compost jackpot. He spent an hour or more explaining and demonstrating how he makes the compost that he sells. Six months after making our first two compost piles using his method I can now vouch for this process. He makes 100 ton batches in 2m x 20m windrows using the passive compost method described here. Our piles are smaller. This passive compost method is slower than the more common hot compost method, however it requires no turning, although one turning after the pile heats up is best. The piles are stacked and left for at least two months to decompose before putting on the garden. Hot compost has to be turned regularly, so it’s not practical for a garden our size. Turning lots of compost piles would almost be a full time job for us without a tractor. That’s why we’re using the passive or slow compost method.
Compost accelerators help ensure rapid decomposition, which is important since we’re using rice hulls that are rather difficult to break down. We’re using three types of compost accelerators or compost activators to speed the process:
1. Inoculated sugar cane compost that’s teaming with beneficial fungi. You’ll have mushrooms everywhere if you spread it on your garden and keep it moist.
2. Rice bran. Wheat bran, etc. with high protein should work just as well. This will help make sure everything breaks down in a timely fashion.
3. EM (effective microorganisms) is the third compost accelerator that we’re using. We get free packets of EM starter from the local agricultural office. Mix it with water, a little agricultural grade unsulphured molasses, chopped banana stalks or fruit scraps and let it brew a week according to the directions. Note how the molasses provides an immediate food source for bacteria and fungi. We mix EM with our fruit and vegetable scraps in large plastic barrels in the shade. It’s the same type of EM we use on the garden. Made correctly, a batch of fermenting EM smells wonderful like bubbly fruit cider. Keep the lid ajar so oxygen and lactobacillus in the air can get into the barrel.
Other compost accelerators to consider: Numerous university studies say the best compost activator is finished compost. Simply set aside some finished compost from each batch and layer it throughout the next pile you make. It only takes a little bit. Leaf mold is an excellent choice so we occasionally add a thin layer of leaves in between layers of manure. This will provide more fungi as well as minerals. Worm tea and compost tea would work very well. We started adding aerated worm tea made from worm castings as we neared the top of the compost piles. I believe each watering will gradually drive these particular organisms down through the pile, thus saving us the work of adding worm tea on each layer. Good soil will also work, especially fungal rich soil from a forest with lots of hyphae. Some gardeners recommend comfrey and stinging nettles. I’m intrigued by Peter Kearney’s compost tea made with weeds.
Compost ratio: Many gardening sources recommend 2/3 browns (high carbon materials) to 1/3 greens (high nitrogen materials) as a good starting compost ratio. In our case, we’re using 2/3 straw and rice hulls to 1/3 manure. This approximates the recommended C:N ratio of 30:1.
Here’s a summary of how we’re making passive compost in the tropics:
We add 9” at a time to the pile that consists of thin layers of rice hulls, aged organic cow manure from local farmers not from feedlots, and straw. In addition, we’re adding EM, inoculated sugar cane compost and rice bran as compost accelerators throughout the pile. Moisten each layer as you go with a garden hose. Cover the pile with straw and protect from intense sunlight with shade cloth. Working under an open air shed would be ideal. We wait for 3 days for the accelerators to activate. After 3 days, pull back the straw in a few spots to check the progress. In our experience, approximately half of the surface area is covered with gray fuzzy mycelium, sometimes more. We repeat the process until the compost pile is 5’ high.
This compost experiment emphasizes the importance of good structure in the pile. This includes adding a layer of branches under the pile to improve aeration, and increasing the amount of surface contact area between different ingredients. Ex: break up big chucks; use thinner layers of alternating materials versus thick layers of each material. Also, build the pile gradually so the compost accelerators (EM, sugar cane compost, bran) have time to get established.
Here are a few key points:
– build the pile in the shade to avoid overheating or rapid drying. In our hot climate I discovered extra shade cloth and total coverage with straw is beneficial. I learned this by observing how quickly the bran became covered in mycelium. In the darkest half it started growing mycelium in two days, while the half with more light had no visible mycelium yet. Multiply this imbalance over 2-3 months and the difference would be significant. Overhead suspended shade cloth is preferable to laying shade cloth directly on the piles, which will inhibit air flow.
– you don’t want the temperature too cold. A cold spell blew through and the mycelium growth stopped when it reached about 50F. Mycelium growth restarted when it reached about 65-70F.
– moisten each layer with a garden hose before proceeding. The materials should be moist like a squeezed out sponge – about 60-65% moisture content. Keeping the pile moist but not too wet is important. Adding too much water will slow decomposition, however, the bigger concern in hot climates is keeping the compost moist enough.
– mix a few pounds of bran in liquid EM to help activate it. Add enough EM to create a milkshake consistency slurry that’s easy to splatter on the pile by hand. In 2-3 days, each splatter will erupt into thick fungus. Done correctly, the whole surface or most of the surface will be covered in fungus in 3 days.
– use loose straw for improved aeration, not flakes.
– use a watering can or garden hose sprayer to spray the straw on the pile with EM (easy way). Or soak the straw in EM first for better saturation (messy way).
– avoid thick layers and dry spots or the materials won’t break down as fast. The materials we’re using are hydrophobic – they repel water. Use your hand to check regularly that water is soaking in okay and everything is moist. A rake is convenient for reaching the center of the pile. Rice hulls in particular are slow to absorb water. I use the force of the garden hose water to ‘push’ the hulls around and speed the watering process to one pass.
– some liquid will drain out the bottom of the pile. Add straw on the ground around the pile to soak up the liquid so you don’t lose this nutrient rich material. This wet straw makes a good covering on the pile.
– the sides of the compost pile slope inward so slighter fewer materials are needed as the pile gets higher. Ex: we used 4 bags of manure instead of 5 bags per layer when the pile got higher.
– we experimented with adding a layer of branches and leaves on one pile at the half way point to see if it would make a difference. The extra branches should improve the aeration of the pile. [Update: we won’t do this again because the branches made it difficult to turn and move the compost later, and also required a special trip to obtain the branches.]
– adding diluted seawater 30:1 is recommended by some sources. Seawater contains every mineral and a diversity of microbial life. Sea salt (not refined salt) can be turned into seawater if you’re not near a sea.
– wear rubber gloves while making compost this way. Even though the ingredients are all safe and natural, they will cause drying of the skin.
– it’s difficult to know for sure which steps will produce the best compost. I obviously favor a ‘shotgun’ approach of combining several easy processes to boost the odds of success of rapid decomposition and adding diversity of life to the soil.
Want to speed up the passive compost method even more? Look into aerated static pile compost that uses mechanical blowers to blow or suck air through pipes or a porous base material under the compost pile.
Q: Do you really need compost accelerators? What about making passive compost with just straw, rice hulls, manure and water? A: Sure, that will work. Like the saying goes – “compost happens.” Manure has bacteria and fungi already in it. Keep the pile moist and well aerated and it will break down eventually without compost accelerators. That’s a good way to make compost real cheap. The point of this experiment is to explore how to speed the process and introduce a wider variety of beneficial bacteria and fungi. The end result can be rich, black compost – or ‘black gold’ that supercharges garden plants. Is that worth some extra time, effort and money? For me it is. Plus, the whole process is great fun. I’m really enjoying every aspect of learning and making compost with this method.
Special thanks to Abe with Vela Creations.com for his input. There’s a barrage of compost information out there and it helps to double check ideas with a professional.
I don’t know where you were living when you wrote this article, but I really appreciate the tips. I have an almost unlimited cheap source for rice hulls, so I’m eager to see what it might take to get them to break down as rapidly as possible.
Owen was living in Thailand when he wrote this.
This article is a brief summary of what I’ve been up to the last six months. Some blog posts are very short and simple. This one is the result of hundreds of hours of research and hard work. I threw myself into this project because good garden soil is so important. One unexpected result is learning how making compost is so much fun. There’s something very interesting and enjoyable about working with nature to build fertile soil.