Tampers for earthbag walls come in many different types and sizes. Some prefer casting the base out of concrete. Some prefer all steel. I even tried a big clunky one made entirely of wood. (It looked like a primitive tool recovered from an archeological site.) Or you could buy one from Home Depot.
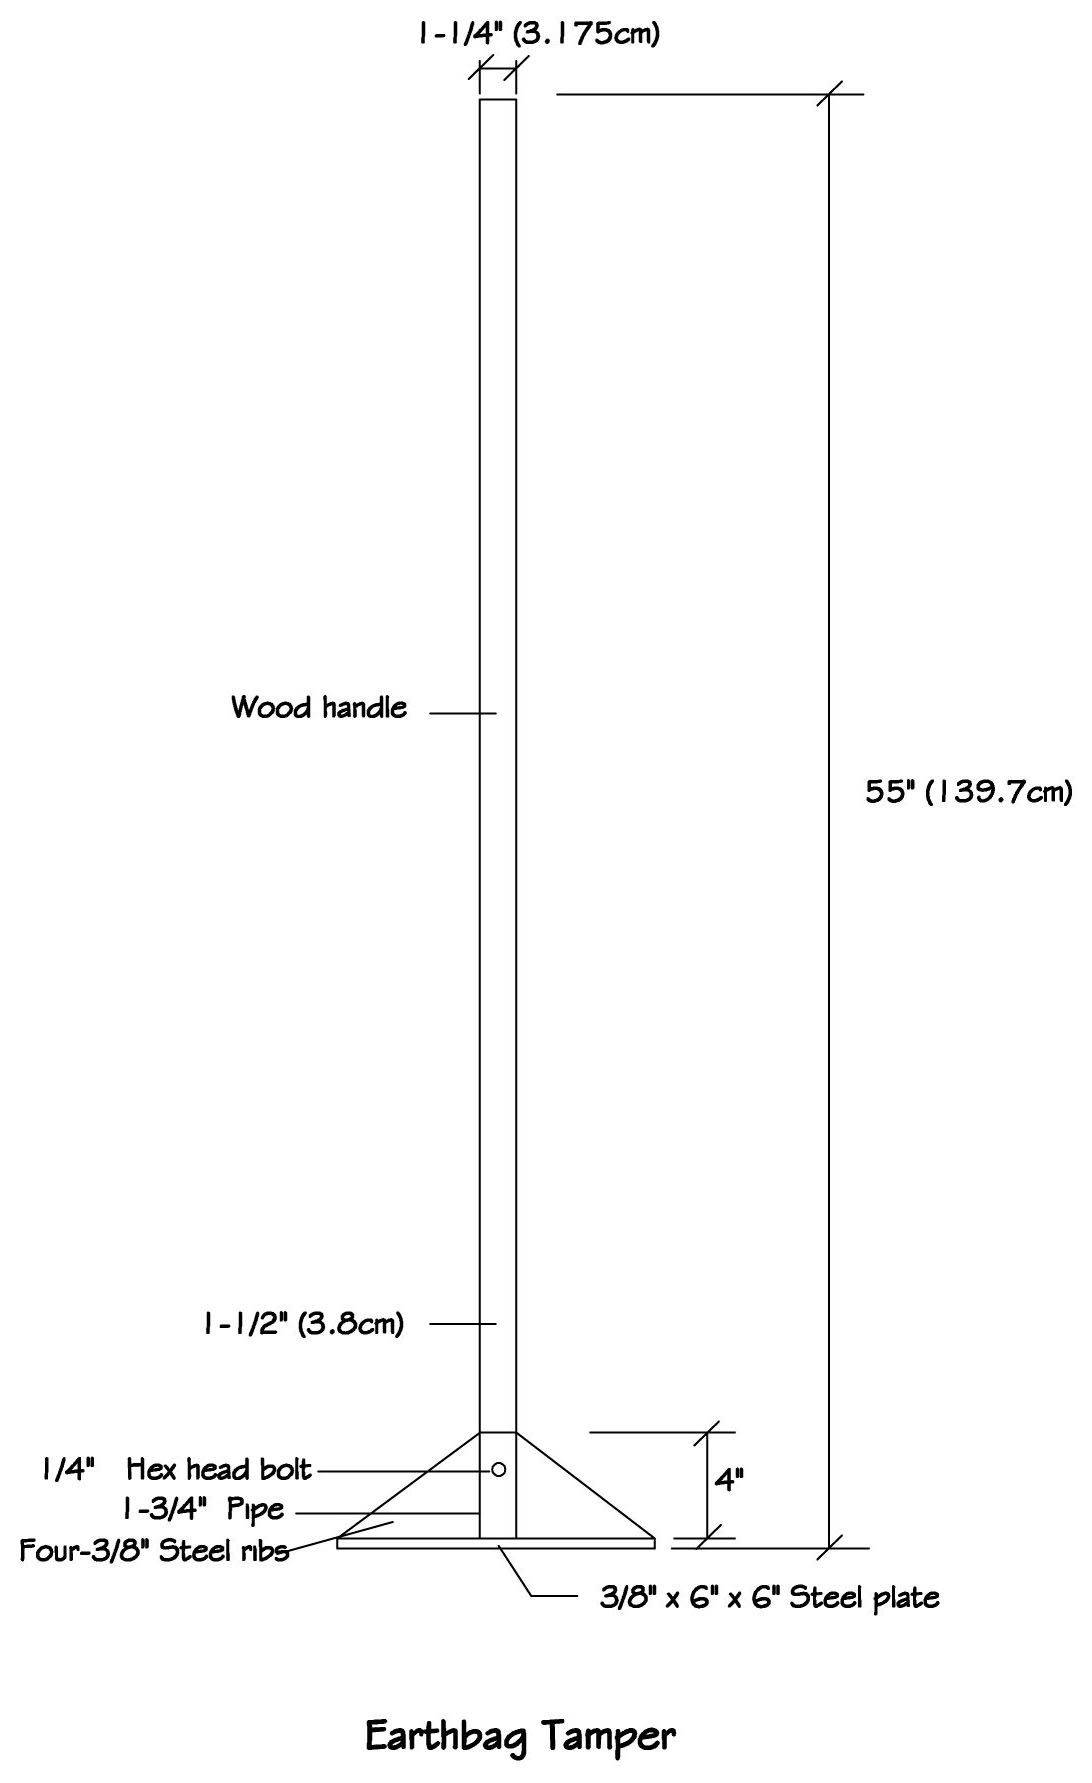
So here’s my favorite tamper. Actually, there’s two – a long and a short handled version with the same steel base design. An agile 45”version is used for lightly tamping bag contents during filling. The long handled tamper (55”) has more gripping surface, making it easier to apply greater force when tamping walls. Both can be used for wall tamping, of course, but it’s convenient to have both sizes. Having two or more tampers on-site enables other workers to help out and choose the most appropriate size.
Steel base: The design is very simple. The base is made of scrap 3/8” plate steel. There’s a good chance you’ll find lots of small scraps at a local welding shop that will work just fine. There’s one 6” x 6” bottom piece, four angled ribs and one 4” piece of 1-3/4” steel pipe welded together. Drill the pipe as shown to accept a ¼” hex head bolt to secure the handle. Grind the edges, remove any rust and oil, and apply your choice of spray paint.
Handles: I much prefer wood handles over metal. They don’t get as hot as metal and have a more comfortable, natural feel. Sand the wood to eliminate splinters and round the end slightly. Fit the handle to the pipe and pre-drill through the wood. Several thin coats of tung oil will protect the wood. The following link has a good summary of tung oil and application instructions: www.mastergardenproducts.com/tungoil.htm.


This is a great tamper design, far worth the cost of construction or $30 if you have a building store in the neighborhood. The only thing I’d consider changing is the size of the flat plate, I tend to prefer a bit wider tamper 10″x10″, so that the majority of the bag is caught with the tamping action. It is heavier, but I feel like the bags will compact with fewer hits. What do you think? Tamping is by far the most tiring part of EB building, and one of the most brutal on our joints. It is important to use proper technique to minimize repetitive injury. I’ve found it is best to let go of the tamper just before it hits the bag, this saves a lot of impact on your body.
Jeff, thanks for the input. A bigger plate may suit stronger workers. This one is just right for me. Maybe I could handle one a little heavier, not sure. They’re so cheap and easy to make that it’s probably worthwhile making several sizes.
And yes, let go just before the tamper strikes the bags or the jolting force will go up in your arms.