At Cob Cottage Company in Oregon Kara Stiff trained in cob, an ancient technique using clay, sand and straw, with stone or recycled concrete for the foundation. They built rounded houses that seemed right out of a fairy tale, using materials that were freely available just about everywhere, non-toxic, cozy and beautiful.
There wasn’t a structure on their land that could be rescued,so they needed to build small and think carefully about materials. They broke ground on the day their youngest child turned one, and moved in when she was just shy of two and a half. It was exhausting, exhilarating, headache-inducing. It was the best and by far the biggest project of her life.
The sheer volume of decisions that must be made when you build a house can be overwhelming. Not just where the bedroom goes, but also what the bedroom is made out of and how you will put those materials together. How will you get it past the dour souls at the building department, and how will you fix your mistakes when you screw something up?
One of the decisions they made was to skip the usual wall materials. You’ve got to pick materials that play well together, and insulate enemies from each other. She liked working with cob, but it was too slow for their project.
Since the building authorities required wood framing anyway, they figured they might as well fill the spaces with something lighter than wet mud. She had seen a demonstration of an old German technique called light straw clay, so they chose that and covered it inside and out with lime plaster.
First they secured framing on top of the concrete stem wall on the concrete footer. This was unusual framing, because the wall needed to be 12 inches thick to satisfy the building code’s requirements for R-value. The sill plates are 2x12s, while the verticals are a double set of 2x4s. The top plates are 2x4s. This is a more materials-intensive and therefore more expensive and more impactful exterior wall than is typically built.
To meet fire code, they had to lay a strip of ¾” plywood on top of the top plates. This is a silly thing to do when using light straw clay. Fire blocking is necessary in framed walls because most insulation is pretty much air, so the space between the siding and the drywall will act as a chimney drawing a fire upward. Light straw clay has insulating air in it, but it’s a very stiff and solid structure with non-contiguous holes and lots of nonflammable rock (aka clay).
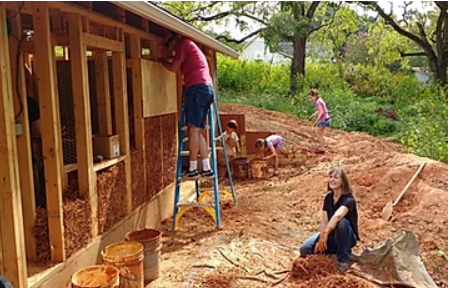
Once the framing was up, they bought 30 bales of local straw costing $150. When they dug into the hill to sink the foundation four feet below the insulating earth, they saved out a nice pile of fairly pure red clay and shoveled that clay into buckets and soaked it with water to make a slurry, mixing it with a paint paddle on a drill. Then they broke each bale in half onto blue tarps, added just enough clay slurry and messed it all around until each individual piece of straw was coated.
How much is enough slurry and enough messing? Too little slurry, and the straw won’t pack or stick together. It wants to pop apart like a bale when the string is cut. Too much and you just have a soggy mess that takes even longer to dry, and a waste of time prepping more clay. The wet muddy straw mixture is perfect when it looks like Carolina chopped barbecue.
After mixing, it’s time to pack that “barbecue” into the walls. They used temporary plywood forms screwed to the framing. These were scraps leftover from the roof sheathing, and they went on to become other useful things in their next life, after washing the mud off. Forms are necessary because straw clay really isn’t at all like clay. It has plans of its own. It resists. It must be pounded and shoved into place, and does not tolerate sculpting. But once it’s there, it’s there.
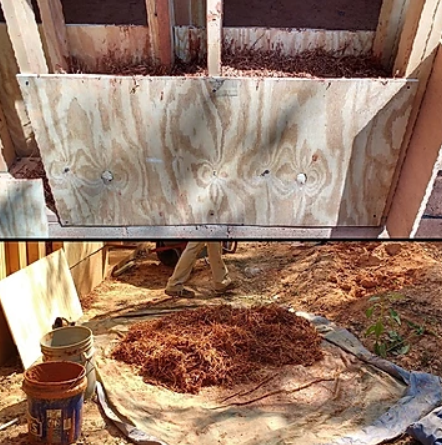
The plywood should be pulled off immediately so the mixture can start to dry. Even in hot sunny weather it takes weeks for a 12-inch wall to dry. The seed in the wheat straw sprouts, and the young roots dig into the wall seeking moisture as the outer surfaces dry. The roots tie the wall together even more, and the leaves pump water out as they photosynthesize. When the grass dies, the wall is dry in the middle.
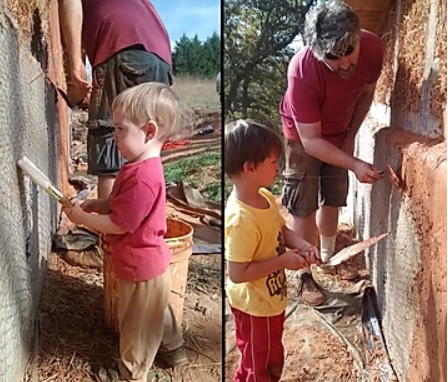
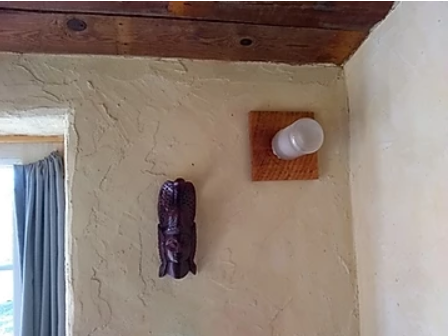
Straw clay makes an excellent base for natural plasters, because it is quite stiff but full of holes for the plaster to ‘key’ or squish into, and hold onto when it hardens. They used seven 50-lb bags of hydraulic lime along with various amounts of leftover masonry sand, salvaged volleyball sand, red clay for color and workability, and water. Troweling on plaster is almost exactly like frosting the world’s biggest and most vertical cake.
They used several different recipes, and some were better than others. In general, the more lime the harder the eventual plaster, up to a point where the lime joints between the sand grains get too large and crack. Their walls that got two good thick layers of 2:1 masonry sand to lime performed the best over time, but that’s a fairly expensive mix. In all they spent $700 on plaster materials.
In some places their plaster is like drywall but with a solid backing, while in others it got mixed too soft or applied too thin. The good news is that lime plaster is very easy to patch. You just slap some on wherever it’s needed whenever you’ve got a batch made. No sanding or feathering-in necessary, because once you hit it with a coat of paint, it’s invisible in the infinitely varying texture of the wall.
The negatives are the typical ones with natural building. It took forever (but nowhere near as long as cob would have). It was messy, and the results more variable than with engineered materials. Probably the biggest drawback is that while straw dust is harmless to most people, a small number of people have an allergic reaction called farmer’s lung.
But on the plus side, lime plaster and straw clay can both get wet without disaster, as they did when she accidentally put a screw through a PEX pipe feeding the shower, or when she messed up the tub installation and didn’t get around to fixing it for a couple of months. Straw and plaster don’t fail like drywall even if they get soaked, as long as they don’t stay wet long enough to mold. The plaster and clay wick the moisture out of the straw, speeding the drying. Though there may be a little surface staining, it’s easily fixed with a coat of paint.
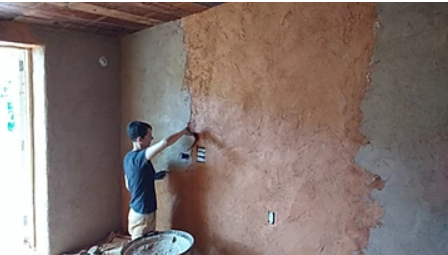
She is very pleased with how the straw clay and plaster walls perform overall. The interior walls seem to have good sound-insulation properties compared to drywall, which matters in a little house with little people. They insulate as well as they were meant to. They look beautiful where they haven’t been skull-bashed, and they were mostly locally-sourced and inexpensive. The exterior plaster keeps the moisture out, which is what you want from a house.
You can read the original article at www.low-carbonlife.org

Great information and experience rich article.
i learned a great deal from this. And a BEAUTIFUL HOME!