Part 1: Earthen Plaster Summary covered the basics of clay, sand and mixing earthen plaster. This next post explains how to apply earthen plaster to earthbag walls.
First, I want to say how incredibly simple this is. It’s as basic as smearing mud on the walls. But a little added know how will help everything go more smoothly, and that’s my goal here. And just to be clear, this is not a thorough “everything you need to know” tutorial. Buy a good book on natural plasters and do more research.

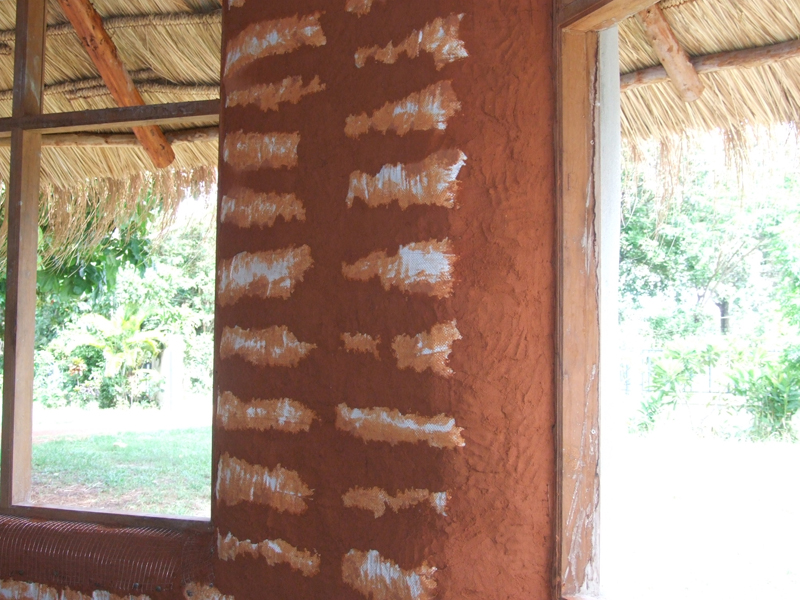
The first step is to smear mud on the walls… I mean earthen plaster. You can use your hands, which is the simplest, most intuitive method, or use a trowel. In this first step, you want to fill the gaps (recesses) between bags. Leave a rough texture to improve bonding with the second coat. You can see in the pic above how the gaps have been filled approximately flush with the bags, and a first coat has been added around edges of windows and doors. Note the gradual curve developing around the window. I really love this look.
After the first coat is finished, you can add mesh around window and door openings. These areas are most prone to cracking, and so it’s prudent to add a little reinforcing mesh for added strength – chicken wire, stucco mesh or similar mesh will all work. Nail the mesh to the bags and the rough bucks. Some builders add mesh directly against the bags before the first coat. I think it’s stronger to embed the mesh in the plaster.
Let the first coat thoroughly dry and then you’re ready for the second coat of plaster. The second coat is about ½” thick and will entirely cover the bags and, for the most part, create a level wall surface. There may be some areas where extra plaster is needed (low areas). Don’t try to fill these problem areas in one pass with a really thick coat, because you’ll likely get too many cracks. Some small cracking is fine, but you don’t want large cracks that weaken the plaster. Add an extra coat to problem areas after the previous coat is thoroughly dry. And remember to leave the wall a little bit rough so the next coat will bond.
Once everything is nice and dry, you’re ready for the finish coat. As explained previously, we sifted our clay soil and sand for this step. We applied a thin finish coat about ¼” thick with rounded pool trowels. Pointed trowels were used around edges. You could apply this coat with your hands, but you won’t get the same results. You’ll have to decide what look you’re after. We wanted nice, smooth walls and so we used trowels. An extra finish coat may be necessary for best results. Tip: moisten the walls lightly with a sprayer or mister immediately before applying each additional coat of plaster.
We stopped at this point, but you could continue polishing the plaster for even more refined results. This is called a compression coat, where you mist the wall and apply extra pressure with a trowel, piece of plastic (some prefer yogurt lids) or similar material.
Next time I want to experiment with throwing plaster on the wall with a trowel. This Clay Plaster video demonstrates the process. I think this method could prove faster and easier than applying plaster with your hands. Please leave a comment if you’ve tried something similar.
Plastering is an extremely important step that will transform ordinary looking bag walls into a thing of beauty. I like to show the final results to people who have only seen the rough bag walls. They walk in, have a bit of shock and instantly light up with a big smile. Believe me when I say a good plaster job makes a big difference. Take your time and do a good job and you’ll be very happy with the results.

we are waiting for more usful information thank you very much Osama
What do you need? Keep searching our websites. Almost everything you need is here for free.
we are an NGO Society bulding earth bag homes in the Egyption Desert as rettin in our wepsite
You have some good ideas. But I don’t see anything about earthbag houses on your website.
Hey Owen and friends,
I have just thrown the stuff ont the wall with good results. One can cover a lot of ground in a short time with the scratch coat in this manner. Like you said, it is a very intuitive process, trust your instincts as far as water content and workability. On one building I worked on, we mixed the plaster with our feet on a tarp and also rolled the tarp. This is done right next to the wall and lobbed directly. Earthen plaster is amazing stuff. Thanks for sharing such valuable information Owen.
Good ideas, Jeff. Thanks for sharing. We did throw some plaster on. Most of the first coat was done like this: 1/2 throw, 1/2 smear, if that makes sense. In other words, the ball of plaster was plopped against the wall and immediately followed by an upward motion of the hand that left a relatively even surface. Then we smoothed the edges a bit to improve bonding.
Mixing right next to the wall is another good idea. However, we had too many workers in the way for this.