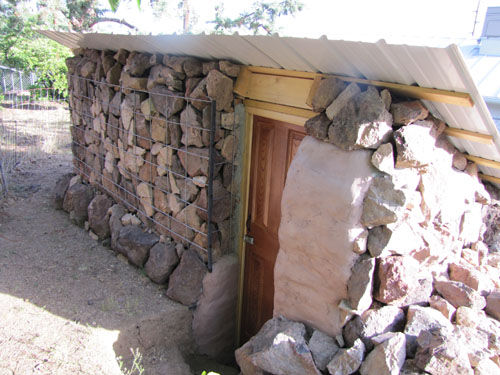
I decided to build a simple recessed cellar in my yard that would serve a variety of functions, including rainwater storage, root cellar and space for vermiculture (worm bins). All of these require relatively cool but not freezing conditions, so digging into the ground was a good way to accomplish this. It seemed like the easiest approach would be to build this primarily with earthbags.
First I calculated how large it needed to be in order to hold the two large (275 gallon) water tanks I intended to buy, as well as provide enough space for produce and worms. It was a tricky business to fit all of this in the space available, especially because I had to work between existing underground irrigation pipes.
Digging wasn’t very easy because I encountered hundreds of stones of many sizes, some quite large. Evidently the soil in that location was actually fill that was pushed into the yard around the time of the original construction of our house (over 70 years ago).
Because this cellar was intended to store root crops as well as the other functions, I did not line the outside of the earthbag walls with plastic as a moisture barrier. The humidity is actually desirable for most root crops, and it wouldn’t hurt the tanks or the worms either.
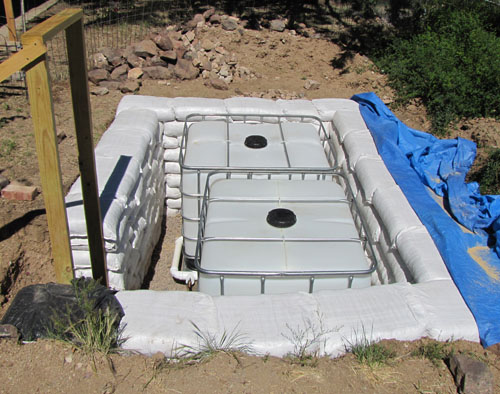
Before I went very high with the walls I needed to place the water tanks where they belonged in the cellar. It was a bit of a shoe horn job to get them situated and plumbed together, but it worked. I had leveled the floor and put a layer of gravel on it first.
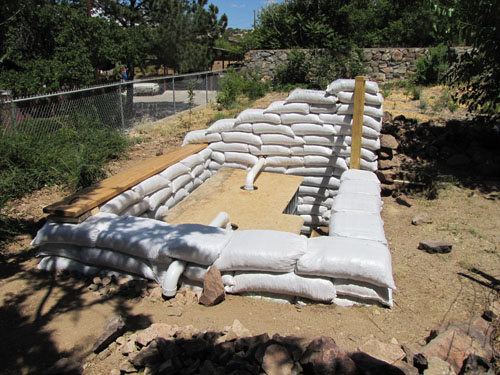
At the point shown in the above photo I had used every scrap of soil left from digging the hole to fill the bags. This got the wall about a foot above the grade level on three sides and inclining all the way to the top on one end. The wood plank on the left is a top plate that will connect to the roof rafters, and it is pinned into the bag wall with long rebar stakes. On top of the water tanks I fitted a piece of OSB to serve as an accessible platform for the worm bins or root crops. The pipes that are visible are 3 inch inlet and overflow pipes for the rainwater. The overflow just dumps into a cobbled area just outside the earthbag wall.
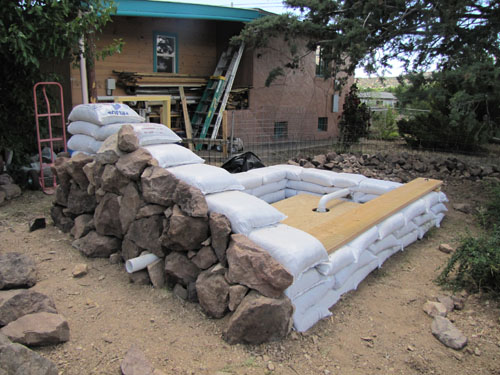
I decided to line the exterior of the exposed earthbags with stones all the way around the building. On this sloping wall I just dry stacked the stones, making sure that they were as stable as possible as they were placed.
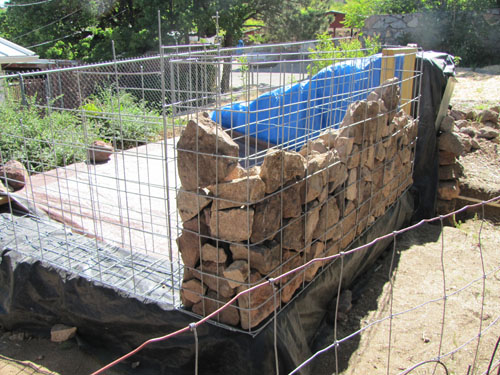
Rather than importing more soil to fill bags for the rest of the walls, I decided to create gabion cages and just fill them with all of the extra stones that were dug up from the hole. I figured that this would also provide plenty of ventilation for the cellar so I wouldn’t need to create separate vents. I wired a wooden top plate on top of the gabion wall as an anchor for the rafters, and then secured stringers on the rafters to hold the metal roofing. Fiberglass insulation was placed between the rafters.
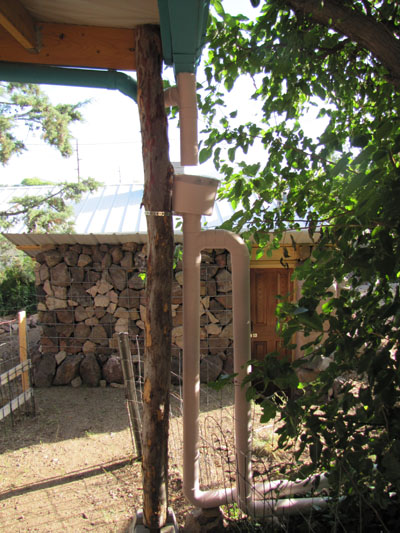
This is what the final cellar looks like with a second hand door that I took apart and insulated on the inside with foam. I am quite pleased with the overall rustic look. Not seen is the final interior plumbing that directs a hose to outside the rock wall, and the little solar pump that operates with a little 40 watt solar panel mounted on the roof. If I throw a switch on a sunny day I can use that rain water to irrigate my garden.
In the foreground you can see the branched system for delivering rainwater to the tanks. The downspout from the gutter on the house feeds into a bucket that is fitted with an eighth inch screen to filter out larger debris. Then the water first goes straight down to fill a “first flush” reservoir. Once this pipe is full the water will be diverted into the side pipe that is plumbed to the water tanks.
So far I am quite happy with how all of this is performing. I have collected about 400 gallons of water from two rain events. After the next rain I will need to use some of the water to make room for subsequent storms. The worms seem quite happy as well. The interior temperature has stabilized to be in the mid 70 degrees F. all day and night. This is with daytime temperatures rising near 100 degrees and nighttime temperatures sometimes dropping into the 50’s. I’m pretty sure that with all of that thermal mass in the cellar it will never freeze in there. Cozy!
For a complete how-to article about building this cellar go to greenhomebuilding.com.

This is fantastic! Love the project! Thanks for sharing!
Great project. This helps show why I love earthbag building so much. You can use earthbags to build so many different things: root cellars, storm shelters, cool pantries, fallout shelters, storage rooms, music rooms, meditation rooms, water tanks, pools, etc.