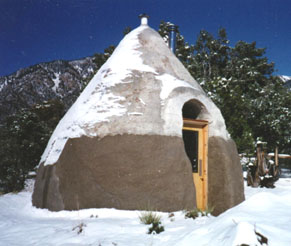
As you can imagine, we get quite a few emails from readers asking about earthbag building. Sometimes these questions and ideas are of interest to a larger audience and so we pass them along to you in this blog. (The best questions and comments also end up on Kelly’s Earthbag Building FAQs.)
Chris, one of our readers, just sent us this request:
“I’ll be starting a project of my own soon and can use all the help and inspiration I can get. At some point I hope you’ll consider doing a serialized article or blog post that follows an earthbag project from inception to finish. In my own case, the earthbagging itself seems pretty straightforward, it’s the planning and details that are intimidating. I don’t know about you, but following someone else’s example always emboldens me quite a bit.”

Since Kelly is taking off on vacation, I’ll take a crack at this. Kelly has an excellent dome building guide that illustrates each step of construction called How to Build a Small Earthbag Dome.
The dome building method Kelly demonstrates in this step-by-step guide is the easiest, fastest method I am aware of. You could use tamped earth or lightweight fill material using this method. I highly recommend using scoria, vermiculite or perlite for lightweight earthbag construction, because of all the many benefits. For one, anyone can handle bags of lightweight fill material by themselves. It’s almost like handling bags of popcorn. In addition, these materials are also fireproof, rot proof, do not attract pests and create highly insulated structures. It’s also important to add that this modest sized dome (14 foot interior diameter) can readily be scaled up to 20 foot interior diameter with just a few modifications.

will this work with larger diameter of say 24′?
can one forego the loft or is it necessary structurally?
what prevents water from wicking up through the floor?
Start with a small dome to develop your skills. Domes larger than 20′ require great care. Read the Om Dome article about the large dome in Thailand.
The loft is optional, although it does help tie everything together and provide a platform to stand on.
Use gravel bags on bottom courses, double-bagged for strength. Set them on a rubble trench.
Jimmie and I (we have posted on the site before) are documenting our planning and everything as best we can. I’m trying to get everything up into a blog, so we can perhaps help other people. I scoured the internet for more planning materials, but they are just not there. We are hoping to document EVERYTHING in order to help the advancement or this type of construction. Any ideas or banding together, shoot me an e-mail or leave a comment on my blog under the “homesteading” page.
Evie
That’s great news Evie. I remember your previous post and followed the link. I used to live near there in Crestone and so that area is special to me. Be nice to the natural builders in Crestone and they’ll tip you off to all the best deals and local resources. If you don’t mind cold weather, the area is perfect for natural building — local sawmills, clay, scoria, etc. are all nearby. I highly recommend using scoria due to the cold climate. Just email us if you have questions. Good luck and enjoy yourself.