I hope you’re enjoying these posts about Eternally Solar’s earthbag method.
Dr. Johnny Anderton of Eternally Solar / EarthBagBuild has kindly supplied more details about their lintel and bond beam system. This is very practical information.

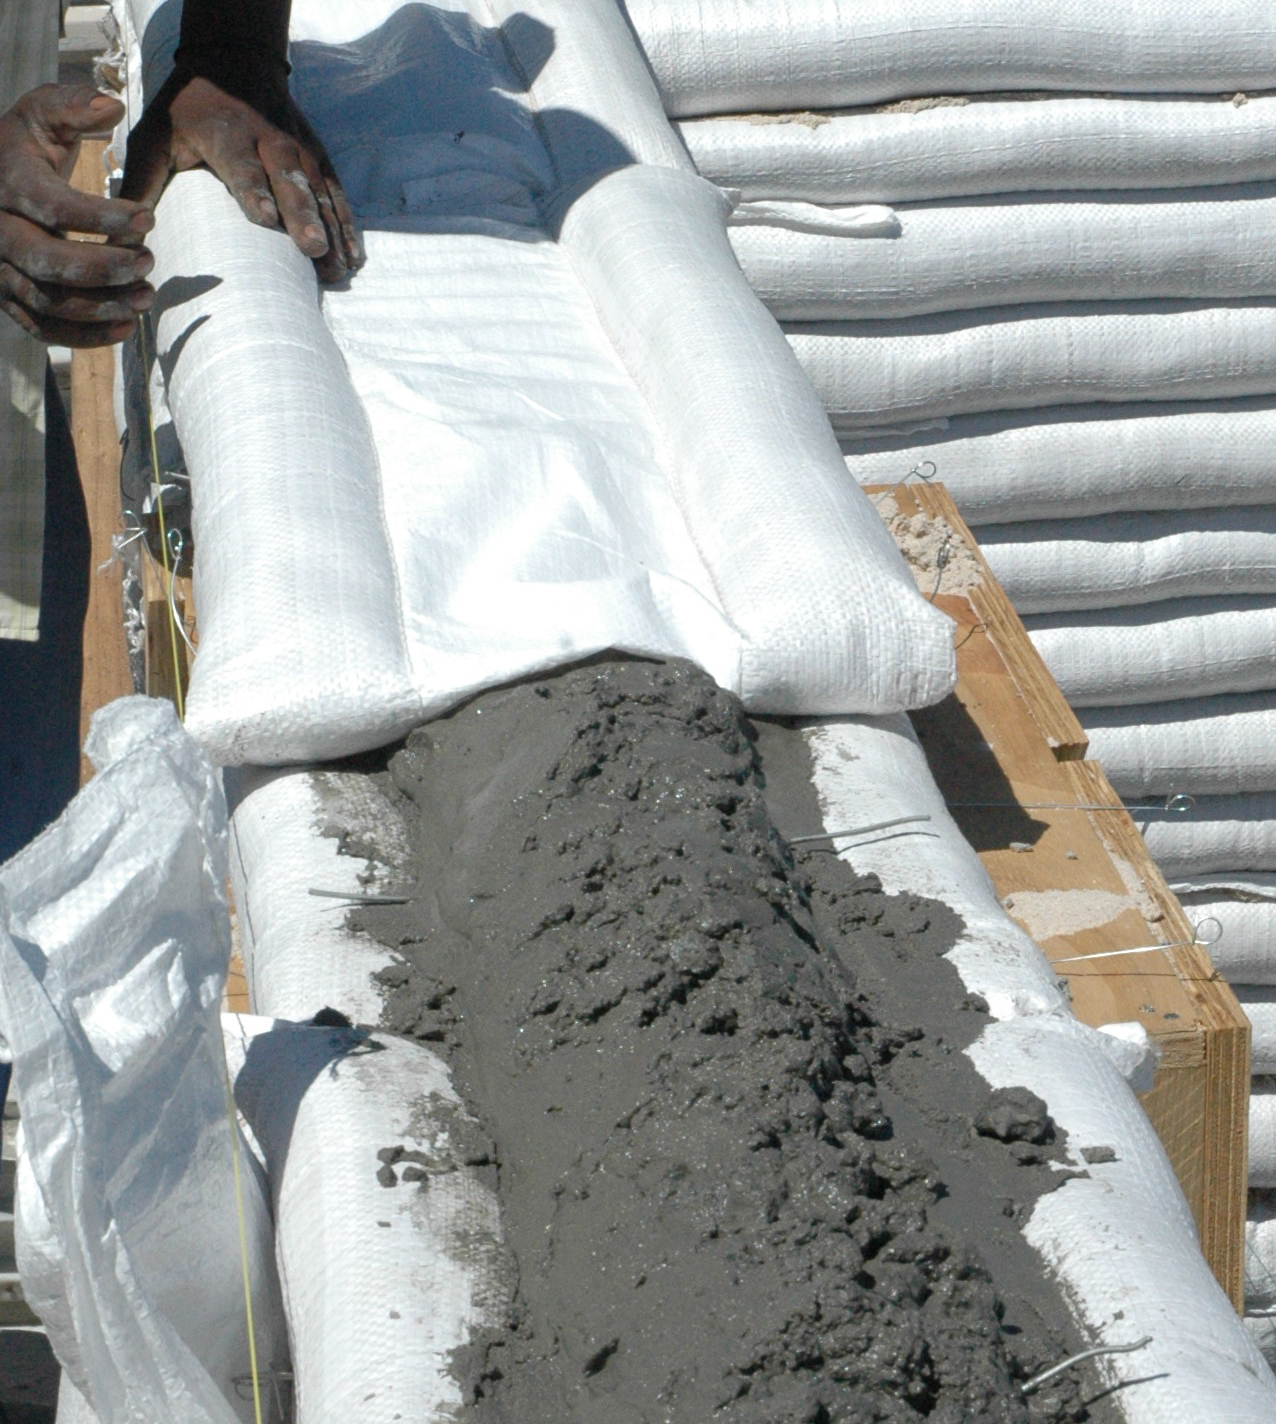
“The attached sequence will show how it goes, with bag layer, then concrete fill in channel, then rebar and more concrete to encase rebar, then another layer of bags etc. The only thing about the bags here is that one should cut some holes, say 3 of around 110 mm diameter in the web of the bags, to create some vertical connection between the rows of infill concrete. Otherwise one has a series of layers of laminate (concrete) that are not connected with each other (no ‘glue’ between the laminate layers). These holes can be cut with scissors, but more efficient to burn 110mm square holes with a simple tool made of steel plate, can heat and melt the holes in 10 bags on top of one another all at once and pre prepare all the bags for laminated beam sections of the wall.
I think that one could build a beam even 6 metres in span, by doing say 8 layers or so. We have only tested to 3m by using 3-4 layers. The strength imparted by the plaster if of cement type is also significant, given its physical separation from the beam, thereby adding stiffness.”
Owen: For vertical reinforcement, why not cut a sharp angle on the end of the rebar and pound it in?
Johnny: Yes, a good idea, as long as all rows are done at the same time and lower layer concrete is not too hard. Anything that adds to the shear strength between the layers.
Owen: How are bags sewn?
Johnny: Bags are machine stitched commercially, but one of the advantages of this system was the possibility of job creation in Africa where poverty is such a big issue. The very smallest industrial machine preferably sewing a chain stitch which is self locking.
Owen: How much do your bags cost and what quantities are they sold in?
Johnny: We currently sell the bags for R4.80 (currently approx 0.68 US cents) here in South Africa. This may seem expensive relative to a simple misprint feedbag, but we are currently trying to claw back some of the funds we spent in developing the system.
The other thing to consider is the savings that can be made through constructing one’s own lintels, ring beams, no barbed wire or chicken mesh required, etc.
Owen: Can your bags be used for round structures? For instance, the outer tubes could be partially filled with lightweight insulation such as perlite so they can be shaped into gentle curves. What’s the smallest practical radius?
Johnny: The first structure we ever built with this system was a curved low garden wall. we did not really alter the level of fill in the tubes as we found that there was more than enough ‘give’ in the bag to allow a reasonable curve. Certainly, if one wanted a really tight bend, then different fill levels could make sense. The smallest practical radius is 5 meters.
Johnny: We have the polyprop tube material specially woven to the width we have found to work the best for our EarthBags. The flat width (tube flattened therefore 2 layers) is 420 mm. The bag is 900 mm long and is stitched lengthwise into 3 equal compartments, each therefore is 140 mm wide. As a tube, this results in a diameter of about 90mm, which when in a wall and slightly flattened means that the lift of each row is about 80mm.
The end of the bag is folded to retain the contents, approx a 150 mm fold resulting in a usable filled bag that is about 750mm long, by 320-340 wide. The plastered wall ends up being around 380 -400 mm wide.
The fill in the tubes is compacted if loose earth or clay mix, or damp sand. Only if dry sand is this not necessary. Easy to compact while in the filling device, simply with a broom handle or similar. No need to be too energetic as the fill is compacted while building the wall.

I have been thinking about the lintel building. What might work, a bit better is to fabricate some large U shaped staples and punch them thru the first bag layer from the window form side. Set the bag on the form, place horizontal rebar across the window span. Tie the rebar to the vertical staple legs. Also tie the cross pieces like was shown in the photo to the staple legs. Then fill with concrete. Place next layer of bags, pushing them down onto the staples. Fill with concrete, then repeat the first row with the rebar. You may even be able to skip 2-3 rows without the horizontal rebar, so long as each layer has some large holes to connect the concrete. One caveat is this process should be done quickly so that you don’t form cold joints between each layer of concrete. You want each layer of concrete to bond with the previous. As much of a continuous pour as possible.
Excellent idea, thanks!
Cool idea. That’s a lot of concrete though.
Yeah, but no more (and possibly even less) than typical bond beams and lintels. You could make lintels with other materials such as wood, salvaged pipe, etc.
Combine this lintel technique with J. Davidovits’ geopolymerized stone, and you will really have a strong beam.
You’d want to test the process first. Make sure your mix is as strong as their mix at the Geopolymer Institute. There’s good potential for sure, but concrete would produce more reliable/consistent results because the properties are better understood. Plus, concrete dries and gains strength much faster.