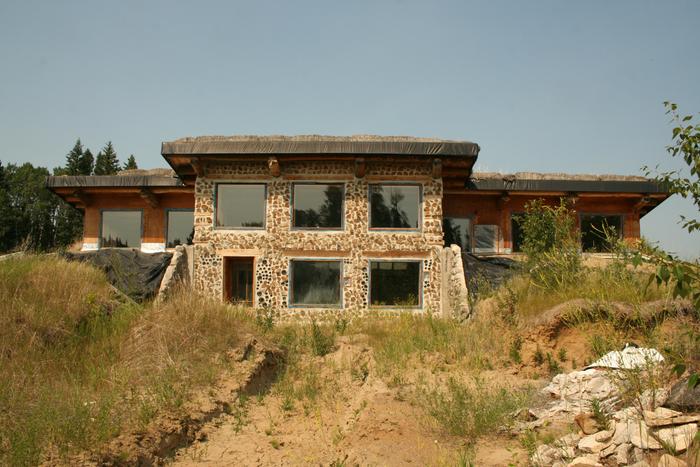
 Myk Brazier here – These are a few pics of the house we’ve been working on. I used Mike Oehler’s book as well as PAHS by John Hait (and a bunch of other stuff). But it’s basically what you’re calling WOFATI. We mixed and poured our own concrete foundation. This house is being built by Meg and myself and a lot of the time it’s just me cuz Meg is gardening.
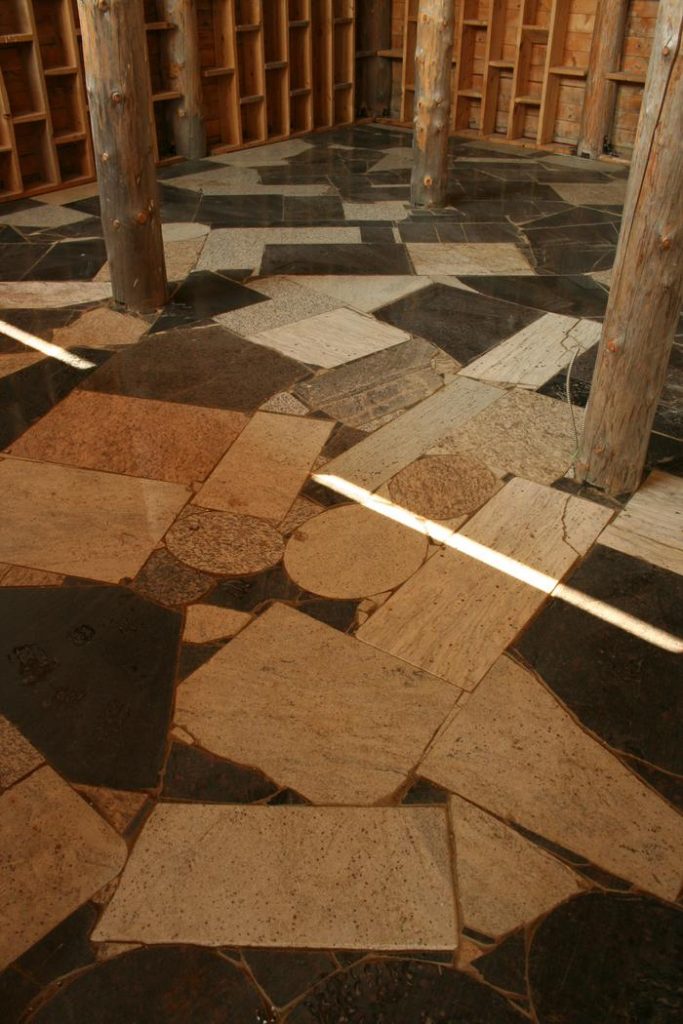 The floor is made of salvage granite counter top material which you can usually get for free it’s an 1 1/4″ thick – we’ve hand bombed 40 tons of it – it took quite awhile but it looks great. The granite countertop salvage is great – it’s so thick that we didn’t have to use a subfloor (as per Oehler’s original design)- we put down woven poly for a vapor barrier and then leveled out some crushed or pea rock and laid the tiles on top – I just chose random shapes and filled in as much as I could and then cut smaller shapes with an angle grinder to fill it in. Alternately you could rent or buy a wet saw and just cut everything into simpler shapes that would go together like conventional tiles. Then when the tiles are laid we pointed them with moistened sand and left about 1/4″ and then just used regular grout – in the pics they are just pointed with sand but now a good portion has been grouted and it looks super! This is a material that usually gets crushed into gravel – we got pieces big enough to make smaller countertops and do 1800 sq. feet of flooring – and we have lots left. Don’t use the polished side up in outdoor projects where it is slippery or you will break yourself.
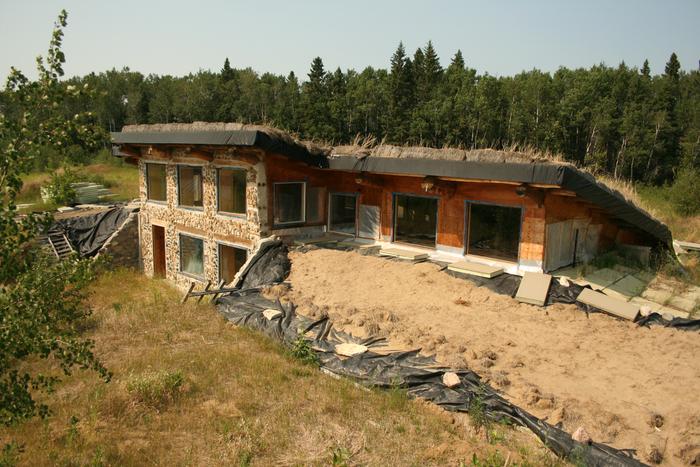 The house is built into the middle of a hill (8ft down) so it drains on all sides. The soil type is well drained sand. So far all waterproofing efforts have been 100% successful. We’ve done a lot of the work by hand so it’s a long haul project but it maintains temp. So we are very happy!
Mike Oehler had great design principles but I had to flesh out the technical details of building using a lot of stuff from Rob Roy’s books. Passive annual heat storage – made the most sense to me for insulation technique – although if you follow it to the letter it can get a little pricey and it’s labor intensive – especially when you are doing a lot of stuff by hand. I talked to Mike on several occasions and kind of gave him a hard time about some of the lack of technical specs. Now he’s in that big underground house in the sky – RIP bud and thanks for the inspiration.
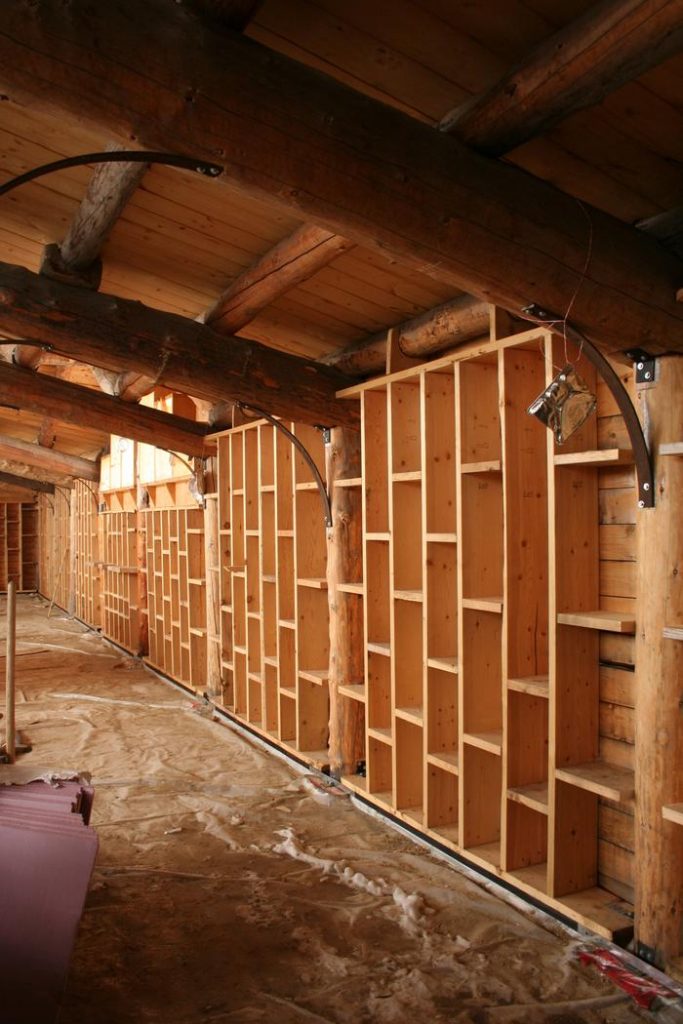 I framed the walls with 2×10’s on 1 foot centers and then used 2×10 scraps to connect them into a shelving system that also adds strength. You can see in the picture that the wall is framed off a base of two 2×10’s the bottom being burnt and coated with linseed oil. The flooring then sits on top of the level foundation piers which locks the bottom 2×10 in place bracing against the granite floor tiles.
I am a big proponent of not burying the posts as I am making a house to last generations and in this part of the world there are not really rot resistant hardwoods.
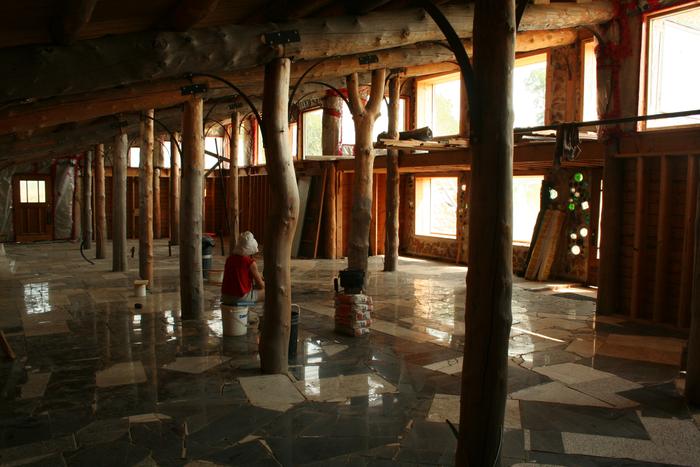 The girders are fastened to each other and the posts with home made metal fasteners and have corner braces made from old metal wheel rims. Info on home made metal fasteners can be found in Rob Roy’s book “Timber Framing for the rest of us”. Also used his books “Earth Sheltered Houses”, which is where I learned about peel and stick membrane – and “Cordwood Masonry – the state of the art”.
Another tip I have about joining the beams to the girders – I used 12″ Lag bolts with compression springs – These are 2″ steel springs sandwiched between washers that you tighten right down and as the wood shrinks (or swells ) the spring tightens or loosens the lag bolt so your framing is tight like a tiger! I got the compression springs from a log home builder.
I sheathed the log frame in 2x material all of which came with the farm (my grandpa had it cut and milled) and was cut from the land where the house resides. I then made the decision to sheath the whole thing again with 1/2″ fir plywood and put a liberal coating of linseed oil between the layers. I did this for strength and to accommodate the peel and stick membrane which is the primary waterproof layer. The advantage of this style of waterproofing is how tightly it bonds to your wall and roof (when you do a good job that is). I was able to completely wrap it around the wall system and join it to the vapor barrier on the inside on the floor.
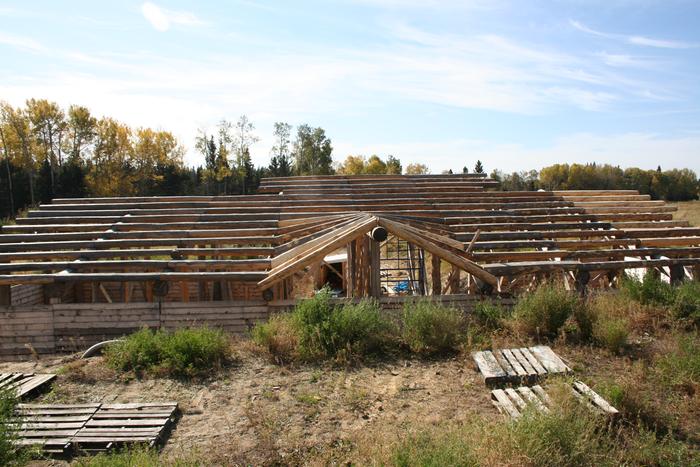 I also wanted to show this gable which comes out the north. If you follow Mike Oehler’s plans he shows how you can open up any side of your house or put a gable in just by raising a log girder on a higher post. The only thing with that is now you have a curved shape and you are putting rectilinear material on it. When it came time to sheathe the gable I phoned up Mike and told him the situation:
“It’s like I’m building the front of ship in the middle of the roof!” I said “What do I do Mike?”
“I don’t know man – I hired a carpenter to do that part.” was his reply.
As I saw it I had two options – soak the boards in the river and bend them over the structure or cut them to match the span between each beam and chisel the opposing corner out on every piece to math the curve. I had to go with latter because it was getting cold and the river was already starting to ice up! It turned out well but took as long to sheathe the gable as it did the whole rest of the roof. It was worth it though for light, ventilation and architectural splendor!
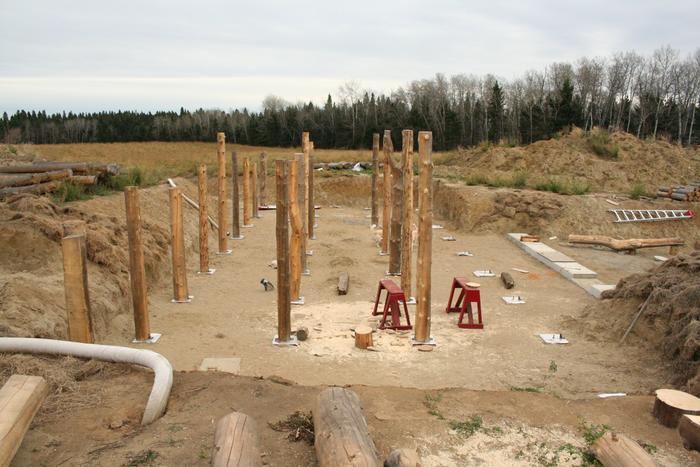 Mike Oehler mentions in his book how when he tried to make a pier foundation with rebar in the center lateral thrust pushed it off. So I dug a 3 to 4 foot hole with an 8″ post hole auger (4 ft. in the corners) and then made a 16″ square form out of 1×6 which gave me space to install angle iron brackets on each side of the posts. Between the post hole and the square form I tapered it out a bit for strength. These brackets were secured with J-bolts around the perimeter and wedge anchors in the center posts. The frost wall at the entrances is a rubble trench with an 8″ slab. We mixed our own concrete cuz at the time a truck wouldn’t have been able to make it through the low level crossing on the way to our house. Mixing your own ‘Crete takes a long time but we were able to do the rubble trench slabs without cold seams and we added weld bond to every batch.
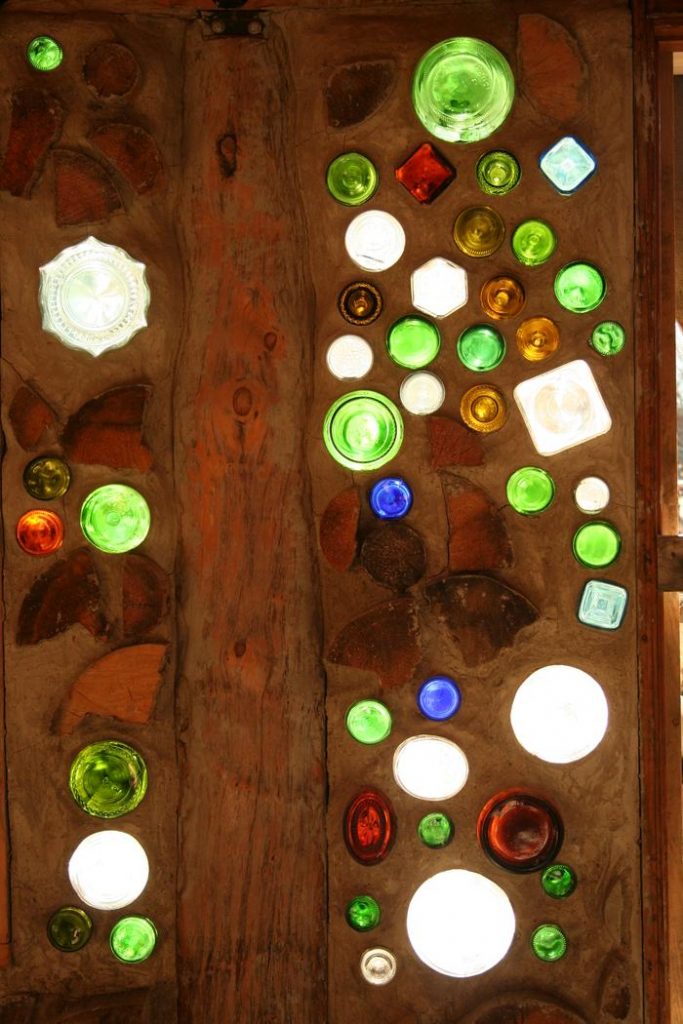 Oh yeah, follow your heart and everything works out.